Using CloudFront with Lambda and S3

Another post in the placeruler series: This time, we are going to use Cloudfront as a router to deliver a static site in addition to the image-generating Lambda
The series is coming to an end. Just having a lambda accessible from the web with caching is not enough. At least if we want anybody to use it. How can you explain what the site does without some static HTML pages?
In today’s post, we will add a homepage. For https://placeruler.knappi.org, I used Astro to generate the site. But you may use any static site generator you like. In this post, we will just set up the infrastructure and assume that our page consists of a few HTML pages.
Dev environment
Firstly, let’s make sure that we can see the website when developing locally:
First, we create a new folder “website” in the project. Second, we add an “index.html” file. Something like
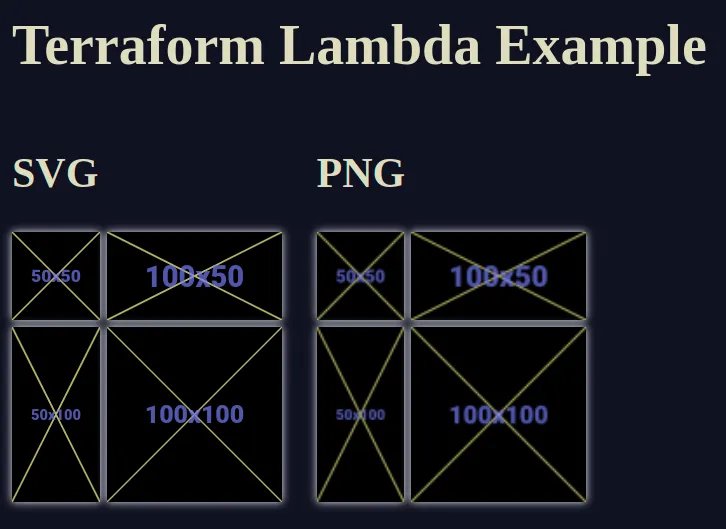
<h1>Terraform Lambda Example</h1>
<h2>SVG</h2>
<img src="api/100x100.svg" />
Third, we run a server to deliver the website. We could add that to our Lambda
dev environment, but maybe it is better to keep them separate. The easiest way
that cam to my mind was: npm install vite and use a simple vite.config with
a proxy configuration:
import { defineConfig } from "vite";
export default defineConfig({
  server: {
    proxy: {
      "/api": "http://localhost:3000",
    },
  },
});
Now, we run npm run dev in the lambda directory and npx vite in the website
directory, we go to http://localhost:5173 to see our website. Nice!
Now that we have the content, we can deploy our files (i.e., our single
index.html) What do we need?
- Create an S3 bucket for the website files. This is the most common approach to hosting a static site on AWS.
- Change the CloudFront configuration: Requests starting with
api/should be delivered to the Lambda, everything else goes to the S3 bucket.
A bucket full of files
For the homepage itself, we will use an S3 bucket. That is the most common and battle-tested approach for static sites on AWS. The Terraform for that is simple:
locals {
  # Define the filename in a local variable so that it can be used in
  # the CloudFront configuration as well.
  s3_website_bucket = "terraform-lambda-example-site"
}

resource "aws_s3_bucket" "static-website" {
  bucket = local.s3_website_bucket
}

# Since we access this bucket through CloudFront,
resource "aws_s3_bucket_public_access_block" "static_site_bucket_public_access" {
  bucket = aws_s3_bucket.static-website.id

  # Prohibit the creation of public ACLs
  block_public_acls       = true
  # Prohibit the creation of public policies
  block_public_policy     = true
  # Ignore ACLs that would allows public access
  ignore_public_acls      = true
  # Only allow authorized users and AWS services to access the bucket
  restrict_public_buckets = true
}
The four settings block_public_acls, block_public_policy,
ignore_public_acls and restrict_public_buckets are a way to make sure that
the bucket is not publicly accessible (see the
docs
for details). We want to only allow access through CloudFront and only read-only
access, except for ourselves.
The
documentation
recommends setting the property block_public_policy on the account-level. This
ensures that users can’t use potential flaws in the ACLs or policy configuration
to remove the settings from the bucket and then set a public policy. It looks
like
this Terraform resource
is more suitable for that setting.
Now, let’s upload our file(s) using the AWS cli tool:
aws s3 cp ./website/index.html s3://terraform-lambda-example-site --cache-control max-age=0Note that you can set the caching headers using the tool. This is helpful if you have static files with hashed names. In this example, we only have one file to upload. However, in the repository for “placeruler.knappi.org, I use Astro to build the site. I then upload the files using this script:
#!/usr/bin/env bash

set -e

# For the generated files with content-hashed names, we use a very long caching period, because
# the files should never be overwritten.
aws s3 cp ./dist/_astro s3://placeruler-website/_astro --cache-control max-age=31536000 --recursive
# When all the dependency-files are uploaded, We add index.html file without caching.
# The new version should be delivered instantly after an update.
aws s3 cp ./dist/index.html s3://placeruler-website --cache-control max-age=0
We can tweak the headers a little, depending on the use case. For example, it
might not be super important that the index.html is delivered instantly, so we
can use some caching here as well.
There is one thing that we should take care of as well, but I haven’t found a good solution yet. At some point, old assets (i.e., JavaScript files, images, and CSS files) should be removed again to save space. If we delete them instantly, and a user has a browser-tab open for a long time, they might try to load a deleted asset at time point. This is very unlikely but can happen theoretically. The ideal way would be to mark them for deletion when before adding the new files and delete them after a fixed period of time. Maybe this is possible using Object tagging I haven’t tried this yet.
Accessing S3 through CloudFront
When we created our CloudFront distribution in a previous post, it looked like this in the Terraform code:
resource "aws_cloudfront_distribution" "main" {
  enabled = true

  aliases = [
    "lambda-example.knappi.org",
  ]

  origin {
    origin_id   = local.cloudfront_lambda_origin_id
    domain_name = trimsuffix(trimprefix(aws_lambda_function_url.main_lambda_url.function_url, "https://"), "/")

    custom_origin_config {
      http_port                = 80
      https_port               = 443
      origin_protocol_policy   = "https-only"
      origin_ssl_protocols = [
        "TLSv1.2",
      ]
    }
  }

  default_cache_behavior {
    allowed_methods = ["DELETE", "GET", "HEAD", "OPTIONS", "PATCH", "POST", "PUT"]
    cached_methods = ["GET", "HEAD"]
    target_origin_id       = local.cloudfront_lambda_origin_id
    cache_policy_id        = aws_cloudfront_cache_policy.test_lambda_cache_policy.id
    viewer_protocol_policy = "redirect-to-https"
  }

  # [...]
}
Now we want to access the Lambda only through the /api/ path. The other
requests should be served from the S3 bucket we just created. So, we need to add
another origin to the distribution. The default_cache_behavior should use
the S3 bucket as origin.
resource "aws_cloudfront_distribution" "main" {
  # [...]

  origin {
    origin_id = local.cloudfront_s3_origin_id
    domain_name = aws_s3_bucket.static-website.bucket_regional_domain_name
  }

  default_cache_behavior {
    allowed_methods = ["GET", "HEAD"]
    cached_methods = ["GET", "HEAD"]
    target_origin_id       = local.cloudfront_s3_origin_id
    cache_policy_id        = aws_cloudfront_cache_policy.s3_cache_policy.id
    viewer_protocol_policy = "redirect-to-https"
  }
}
The Lambda origin is accessed by an ordered_cache_behavior now, configured
with the correct path:
# Send requests starting with "/api/" to the Lambda
ordered_cache_behavior {
  path_pattern           = "/api/*"
  # We need to set at least GET and HEAD, or an error will occur during deployment
  allowed_methods = ["GET", "HEAD"]
  cached_methods = ["GET", "HEAD"]
  target_origin_id       = local.cloudfront_lambda_origin_id
  cache_policy_id        = aws_cloudfront_cache_policy.test_lambda_cache_policy.id
  viewer_protocol_policy = "redirect-to-https"
}
We also need a cache policy to specify which cookies, query parameters, and headers should be forwarded.
resource "aws_cloudfront_cache_policy" "s3_cache_policy" {
  name = "example_s3_cache_policy"
  parameters_in_cache_key_and_forwarded_to_origin {
    cookies_config {
      cookie_behavior = "none"
    }
    query_strings_config {
      query_string_behavior = "none"
    }
    headers_config {
      header_behavior = "none"
    }
  }
}
Why isn’t this working?
This above code is enough to make the deployment work, but when we try to access the website, an error is returned:
<Error>
  <Code>AccessDenied</Code>
  <Message>Access Denied</Message>
  <RequestId>PD5DVR1TCBGWVA6W</RequestId>
  <HostId>M/HjptWBIbOR09rEtwyCjpWxnQfNQTc3aDQWQoAyQ6b9Gjmj+3C4ERrLqMaijacM/+sKIyIbNYU=</HostId>
</Error>
In fact, we need to do multiple things to make it work:
Deploy the S3 files to the correct bucket.
I was, of course, trying all this while writing this post. And I was a bit
confused that neither https://lambda-example.knappi.org/ nor
https://lambda-example.knappi.org/index.html worked. One of the things I did
wrong was to deploy the files to the wrong bucket. I copied and pasted the
deployment script from “placeruler” repository and deployed my index.html file
to the placeruler bucket. A missing index.html file also results in an “Access
Denied” error.
The reason why this happened was that I had two places where the bucket name was specified: The terraform files and the deployment script.
What if we could actually have a single source of truth here? I found one way to
do that: We can actually access the values of outputs from CLI. We can add
output "s3_website_bucket" {
  value = local.s3_website_bucket
}
to the S3 bucket terraform file and then after running terraform apply, use
the value of that output via
TARGET_BUCKET="$( terraform output -raw s3_website_bucket)"
aws s3 cp ./website/index.html "s3://${TARGET_BUCKET}" --cache-control max-age=0
This helped upload the file to the bucket. It didn’t solve the “Access Denied” error.
Origin Access Control
CloudFront needs to send authenticated requests to the S3 bucket. The
recommended way to do this is
Origin-Access-Control,
so we need to specify an aws_cloudfront_origin_access_control resource:
resource "aws_cloudfront_origin_access_control" "cf-s3-oac" {
  name                              = "Terraform Example CloudFront S3 OAC"
  description                       = "CloudFront S3 OAC"
  origin_access_control_origin_type = "s3"
  signing_behavior                  = "always"
  signing_protocol                  = "sigv4"
}
We also need to configure the S3 origin to use this OAC resource:
origin {
  origin_id                = local.cloudfront_s3_origin_id
  origin_access_control_id = aws_cloudfront_origin_access_control.cf-s3-oac.id
  domain_name              = aws_s3_bucket.static-website.bucket_regional_domain_name
}
CloudFront is signing requests, and the bucket can verify the origin. But we still get “Access Denied” errors.
S3 Bucket Policy
We also need an S3 Bucket Policy that allows access from our CloudFront distribution to S3 objects in the bucket. We need to add this IAM policy to allow that:
data "aws_iam_policy_document" "s3_bucket_policy" {
  statement {
    # Allow retrieving objects...
    actions   = ["s3:GetObject"]
    # ...from the bucket we have added above...
    resources = ["${aws_s3_bucket.static-website.arn}/*"]
    # ...by the CloudFront service...
    principals {
      type        = "Service"
      identifiers = ["cloudfront.amazonaws.com"]
    }
    # ...but only if the ARN equals the ARN of our distribution.
    condition {
      test     = "StringEquals"
      variable = "AWS:SourceArn"
      values   = [aws_cloudfront_distribution.main.arn]
    }
  }
}

# Attach this policy document to our bucket.
resource "aws_s3_bucket_policy" "static_site_bucket_policy" {
  bucket = aws_s3_bucket.static-website.id
  policy = data.aws_iam_policy_document.s3_bucket_policy.json
}
This helps a little. We still get an “Access Denied” error when calling https://lambda-example.knappi.org/, but https://lambda-example.knappi.org/index.html works.
Default Root Object
Even if we’ve deployed the index.html file to the bucket, S3 doesn’t
automatically use it as a default root object when / is requested. This can be
done through a
aws_s3_bucket_website_configuration,
or in CloudFront. Since we don’t want to access the bucket as website directly,
we use the default_root_object in the CloudFront distribution:
resource "aws_cloudfront_distribution" "main" {
  enabled             = true
  default_root_object = "index.html"
  # [...]
}
Another try and “Hooray:” We finally see the homepage, including the embedded placeholder images at https://lambda-example.knappi.org/
Conclusion
This post was way longer than I expected it to be. Thanks for reading up to the end. We have covered a couple of topics here.
- CloudFront configuration with multiple origins.
- Access control between CloudFront and S3.
- Retrieving outputs from Terraform via CLI
- Setting up and deploying files to and S3 bucket.
The branch 0034-cloudfront-s3-multi-origin of the example repository contains the state of the project up to and including the changes of this post. If you want to try it yourself, you can always use that project as a reference.
I hope you enjoyed that post and will be there for the next one as well.