Combining Hetzner DNS and AWS with Terraform

I have my domains hosted by Hetzner, but my placeruler project is hosted on AWS. This post is about setting up SSL certificates and DNS records in a multi-cloud fashion, using Terraform. For me that gain is that I could save the cost of Route53. But who knows what else is possible by using Terraform as glue between the clouds.
A couple of pieces are still missing in the creation of the
placeruler project. One of them is the domain
that the site is running on. So far, we have used a domain assigned by
CloudFront, which is https://d1717pcsybzcz9.cloudfront.net/ right now. Not very
helpful, especially, because terraform destroy && terraform apply will change
this URL.
What I really want is to use a real domain, and because I am cheap, I want to
use a subdomain of knappi.org, which I already own. knappi.org is hosted at
Hetzner and so far, I have created all my DNS records
manually.
For this project, I have to add a CNAME record to point to the CloudFront
distribution, and since this URL is more or less random, I would have to repeat
the process every time I destroy and apply. That sounds annoying, and it is.
If you want to skip right ahead to the examples, you can open the branch in the example repository
Using the Hetzner DNS provider
So, manual creation of DNS records is not an option. I want to automate this. Luckily, there is a Terraform provider for Hetzner DNS, called hetznerdns.
And this is where I got really excited, because we can use Terraform to glue the AWS configuration and the Hetzner configuration together.
First, let’s do a small refactoring and move the provider definitions into a
separate file. Because we then need to add hetznerdns to the
required_providers and that tag can only exist once in the configuration.
terraform {
  required_providers {
    aws = {
      source  = "hashicorp/aws"
      version = "~> 5.0"
    }
    archive = {
      source  = "hashicorp/archive"
      version = "~> 2.0"
    }
    hetznerdns = {
      source  = "timohirt/hetznerdns"
      version = "2.1.0"
    }
  }
  required_version = ">= 0.13"
}

# Configure the AWS Provider
provider "aws" {
  region = "eu-west-1"
}

# Configure the Hetzner DNS Provider
variable "hetzner_dns_token" {}

provider "hetznerdns" {
  apitoken = var.hetzner_dns_token
}
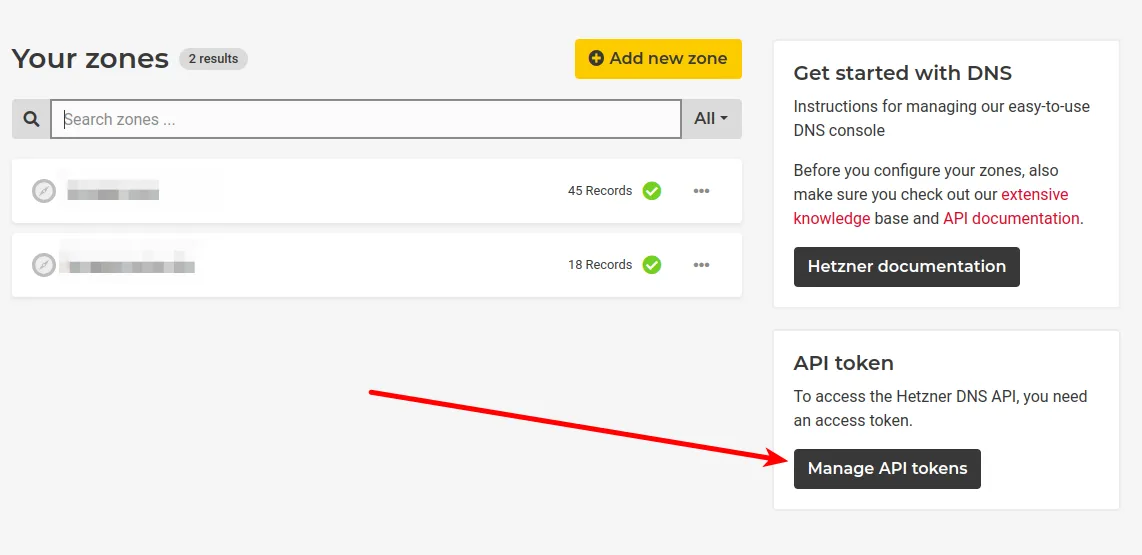
The hetznerdns provider requires an API token that we can generate in the
Hetzner DNS Console. Go to https://dns.hetzner.com/. Then click “Manage API
tokens” and create a new token.

Because we don’t want to add the token to the repository, we don’t put it into the Terraform file directly. Instead, the line
variable "hetzner_cloud_token" {}loads the token from a variable, which can be specified in a .tfvar file.
Files with the ending .auto.tfvars are loaded automatically by Terraform. In
this medium post, The_Anshuman
write that auto.tfvars files are commonly used to store sensitive information.
We can create a file hetzner.auto.tfvars with the following content:
hetzner_dns_token="1nsert_t0k3n_h3r3_X1Y2Z3"Of course, we must not forget to add this file to .gitignore.
Creating a DNS record
Once with have done this, we can create another file hetzner-dns.tf and add a
record there. For convenience, I am using locals for the configuration values.
In reality, I would suggest using variables and .tfvar files.
locals {
  hetzner_dns_zone = "knappi.org"
  domain_name      = "lambda-example.knappi.org"
}

data "hetznerdns_zone" "zone" {
  name = local.hetzner_dns_zone
}

resource "hetznerdns_record" "main" {
  zone_id = data.hetznerdns_zone.zone.id
  name    = "${local.domain_name}."
  value   = "${aws_cloudfront_distribution.main.domain_name}."
  type    = "CNAME"
  ttl     = 60
}
This will create a CNAME record for the domain lambda-example.knappi.org.
The value is set to the domain name of the CloudFront distribution.
One mistake I made was to forget the dot at the end of the name and value.
This is required for a valid zone file, and it took me a while to find out.
So, let’s try this out. Open the browser go to http://lambda-test.knappi.org and we can clearly see that it…
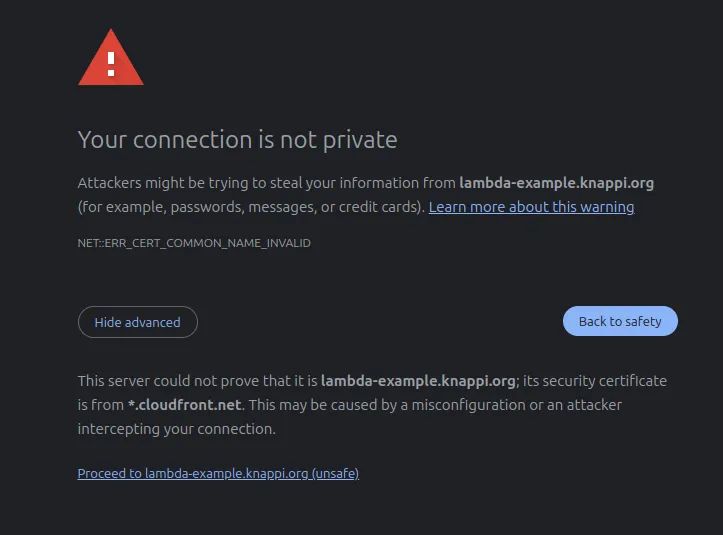
… shows an error: “403 ERROR. The request could not be satisfied.” Opening the https-version directly, results in a certificate error

There are two problems here:
Firstly, we need to tell Cloudfront to accept the custom domain by adding an
aliases block to the CloudFront distribution.
resource "aws_cloudfront_distribution" "main" {
  enabled = true

  aliases = [
    "lambda-example.knappi.org",
  ]
  # ...
  # ...
  # ...
}
Secondly, we need to issue an SSL certificate for the domain. Without this certificate, we cannot even deploy our change to CloudFront as it requires a valid certificate for each alias.
This is a bit more work, so let’s start a new section…
Creating a certificate using AWS Certificate Manager
AWS provides a facility to create simple SSL certificates for free: The AWS Certificate Manager (ACM).
Generating a certificate seems to be simple at the first glance. We just add
this to a new file (e.g. certificat.tf).
resource "aws_acm_certificate" "lambda_test_cert" {
  domain_name       = var.domain_name
  validation_method = "DNS"
  # Hint: We need to add more code here...
}
We can now reference the certificate from CloudFront via ARN. CloudFront also
needs to know whether it should use
Server Name Indication
(SNI) or virtual IPs to choose a certificate. sni-only is
recommended,
so we use it here. It is also the cheaper option.
viewer_certificate {
  acm_certificate_arn = aws_acm_certificate.lambda_test_cert.arn
  ssl_support_method  = "sni-only"
}
Deploy and …
… we get another error:
Error: updating CloudFront Distribution (EY26X8T92A3JU): operation error CloudFront: UpdateDistribution, https response error StatusCode: 400, RequestID: cfa754ab-c596-42b6-b025-3606683ca645, InvalidViewerCertificate: The specified SSL certificate doesn’t exist, isn’t in us-east-1 region, isn’t valid, or doesn’t include a valid certificate chain.
CloudFront is a global resource, not tied to a specific region, and it can only
use certificates that are created in the us-east-1 region. So, we need to add
another AWS provider for the us-east-1 region (in providers.tf).
provider "aws" {
  region = "us-east-1"
  # I don't know it underscores are better than dashes,
  # but when we reference it, underscores seem more natural
  alias = "us_east_1"
}
Then, we need to use that provider in the certificate definition.
resource "aws_acm_certificate" "lambda_test_cert" {
  domain_name       = local.domain_name
  validation_method = "DNS"
  provider = aws.us_east_1
}
The other problem is that our certificate has not been validated yet. When using DNS validation, the certificate-resource provides some DNS records that need to be added to the DNS zone in order to prove ownership of the domain.
Similarly to the CNAME record, we add a hetznerdns_record resource for each
validation record in our hetzner-dns.tf file.
resource "hetznerdns_record" "certificate_validation" {
  for_each = {
    for dvo in aws_acm_certificate.lambda_test_cert.domain_validation_options : dvo.domain_name => {
      name   = dvo.resource_record_name
      value = dvo.resource_record_value
      type   = dvo.resource_record_type
    }
  }

  zone_id = data.hetznerdns_zone.zone.id
  name = each.value.name
  value = each.value.value
  type = each.value.type
}
This is a bit more complicated, because it involves loops: The
lambda_test_cert resource provides a list of domain_validation_options.
for_each
is a meta-argument that allows to create multiple instances of a resource. The
for expression
transforms the list of domain_validation_options into a map, using the
domain_name as key for each entry. The following bracket defines the structure
of the map’s values. Having this defined, we can access the each object in the
resource block to get the values the current entry. The zone_id is the same
for each record, so we don’t use the each object here.
Let’s try it again, and this time it works. The lambda is now available at https://lambda-example.knappi.org.
Conclusion
I don’t know if you would consider this example a “multi-cloud” setup. Usually, we think about multi-cloud when using Google Cloud and AWS, maybe Azure together in one project, presumable to gain some kind of redundancy. But for me “multi-cloud” simply means: Multiple cloud providers. Hetzner might be small, but they call their service “Hetzner Cloud”.
The point is: There are values generated by AWS, like the CloudFront domain name and the certificate validation records, and we can use those values to configure resources in a different cloud provider. In this case it is Hetzner, but it can also be Google Cloud or Azure. I find it very fascinating how easy it was to weave those two providers together.
As always you can see the code for this in the 0031-aws-certificates-hetzner-domain@ branch of the example repository. I have separate branches for each post, so you can compare the changes.
You may also see the branches for future articles, since I am writing those already.
I hope you enjoyed this post. If you have any questions or suggestions, feel free to contact me on the socials shown in the box.