Wooden Enterprise D (Aligning decks)
I cleaned up a lot of stuff and made a 3d-model. And I published my sources, but not as Open Source (yet)
With New Years, a large part of my anxiety is gone now. I don’t expect you to understand, but I’m a Grinch… Halloween is the entrypoint of my anxiety phase, which only ends when the last person has finished shooting fireworks in the area.
I did not party yesterday. Instead, I worked on this project. I have set up tools to extract templates from my master file. And I have created a 3d model. Let me show you.
My sources
At https://gitlab.com/nknapp/wooden-enterprise-d, you can now have a look at my
source-files. The file deck-master/all-deck-outlines.svg contains all the
tracing work I have done so far.
For reasons of legal uncertainty, I have not included the blueprints itself in the repo. Instead, there is a tool to download them. If you want to have a look for yourself, read the README…
What did I do?
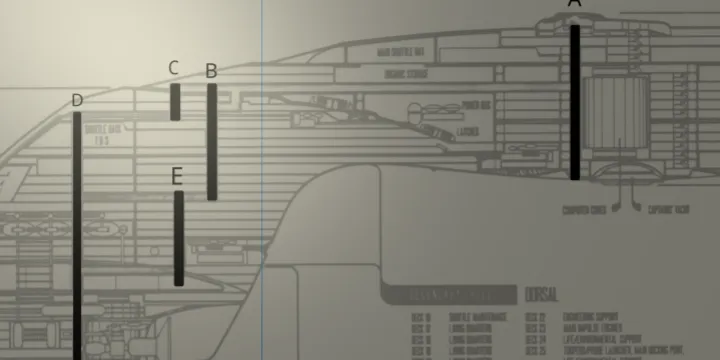
Remember the deck-outline shown in my last blogpost? I put them all over each other, aligned on their vertical shafts.
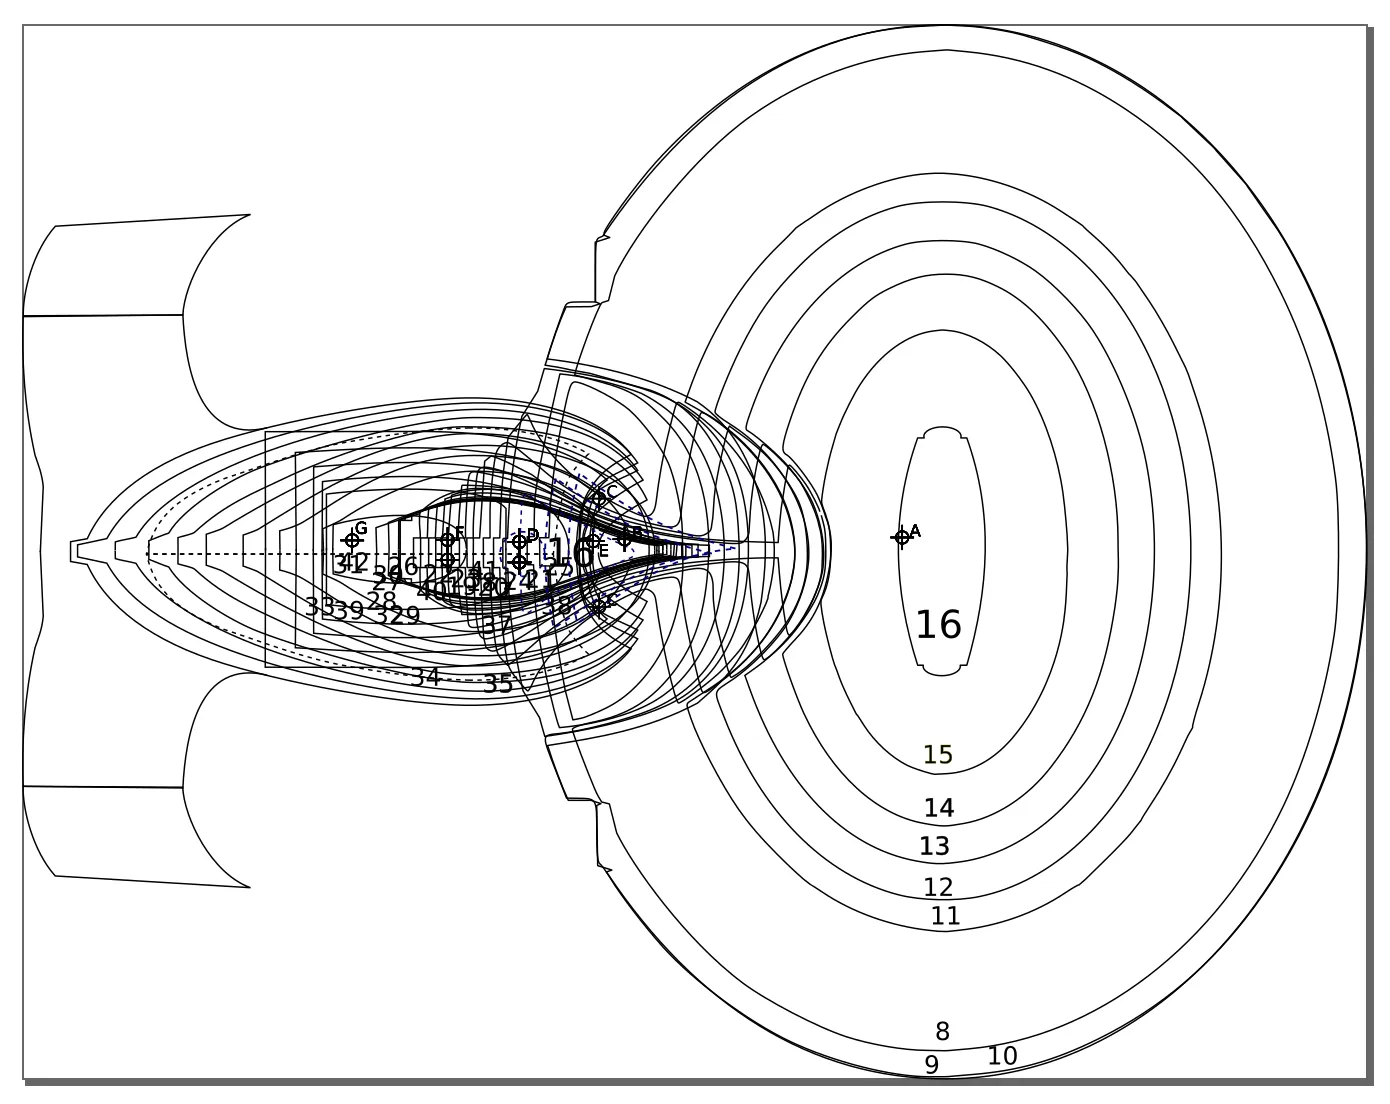
Well, it turned out the markers were not exactly in the same place. I noticed that when I had more than one reference point. That was to be expected, however. The plans were never made for this purpose and some of the error was due to my manual work as well, I suppose.
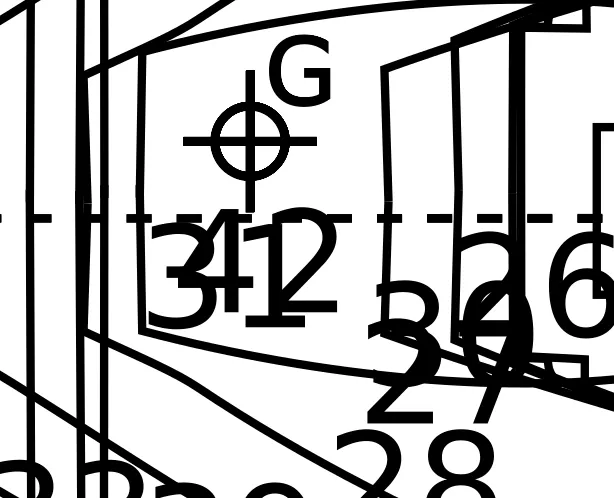
But when I cut the decks from wood, it is better to have exact orientation points, so I manually moved the markers on top of each other. In the following image, there seems to be only on “G” marker, but in reality there are many. Just at the same place.
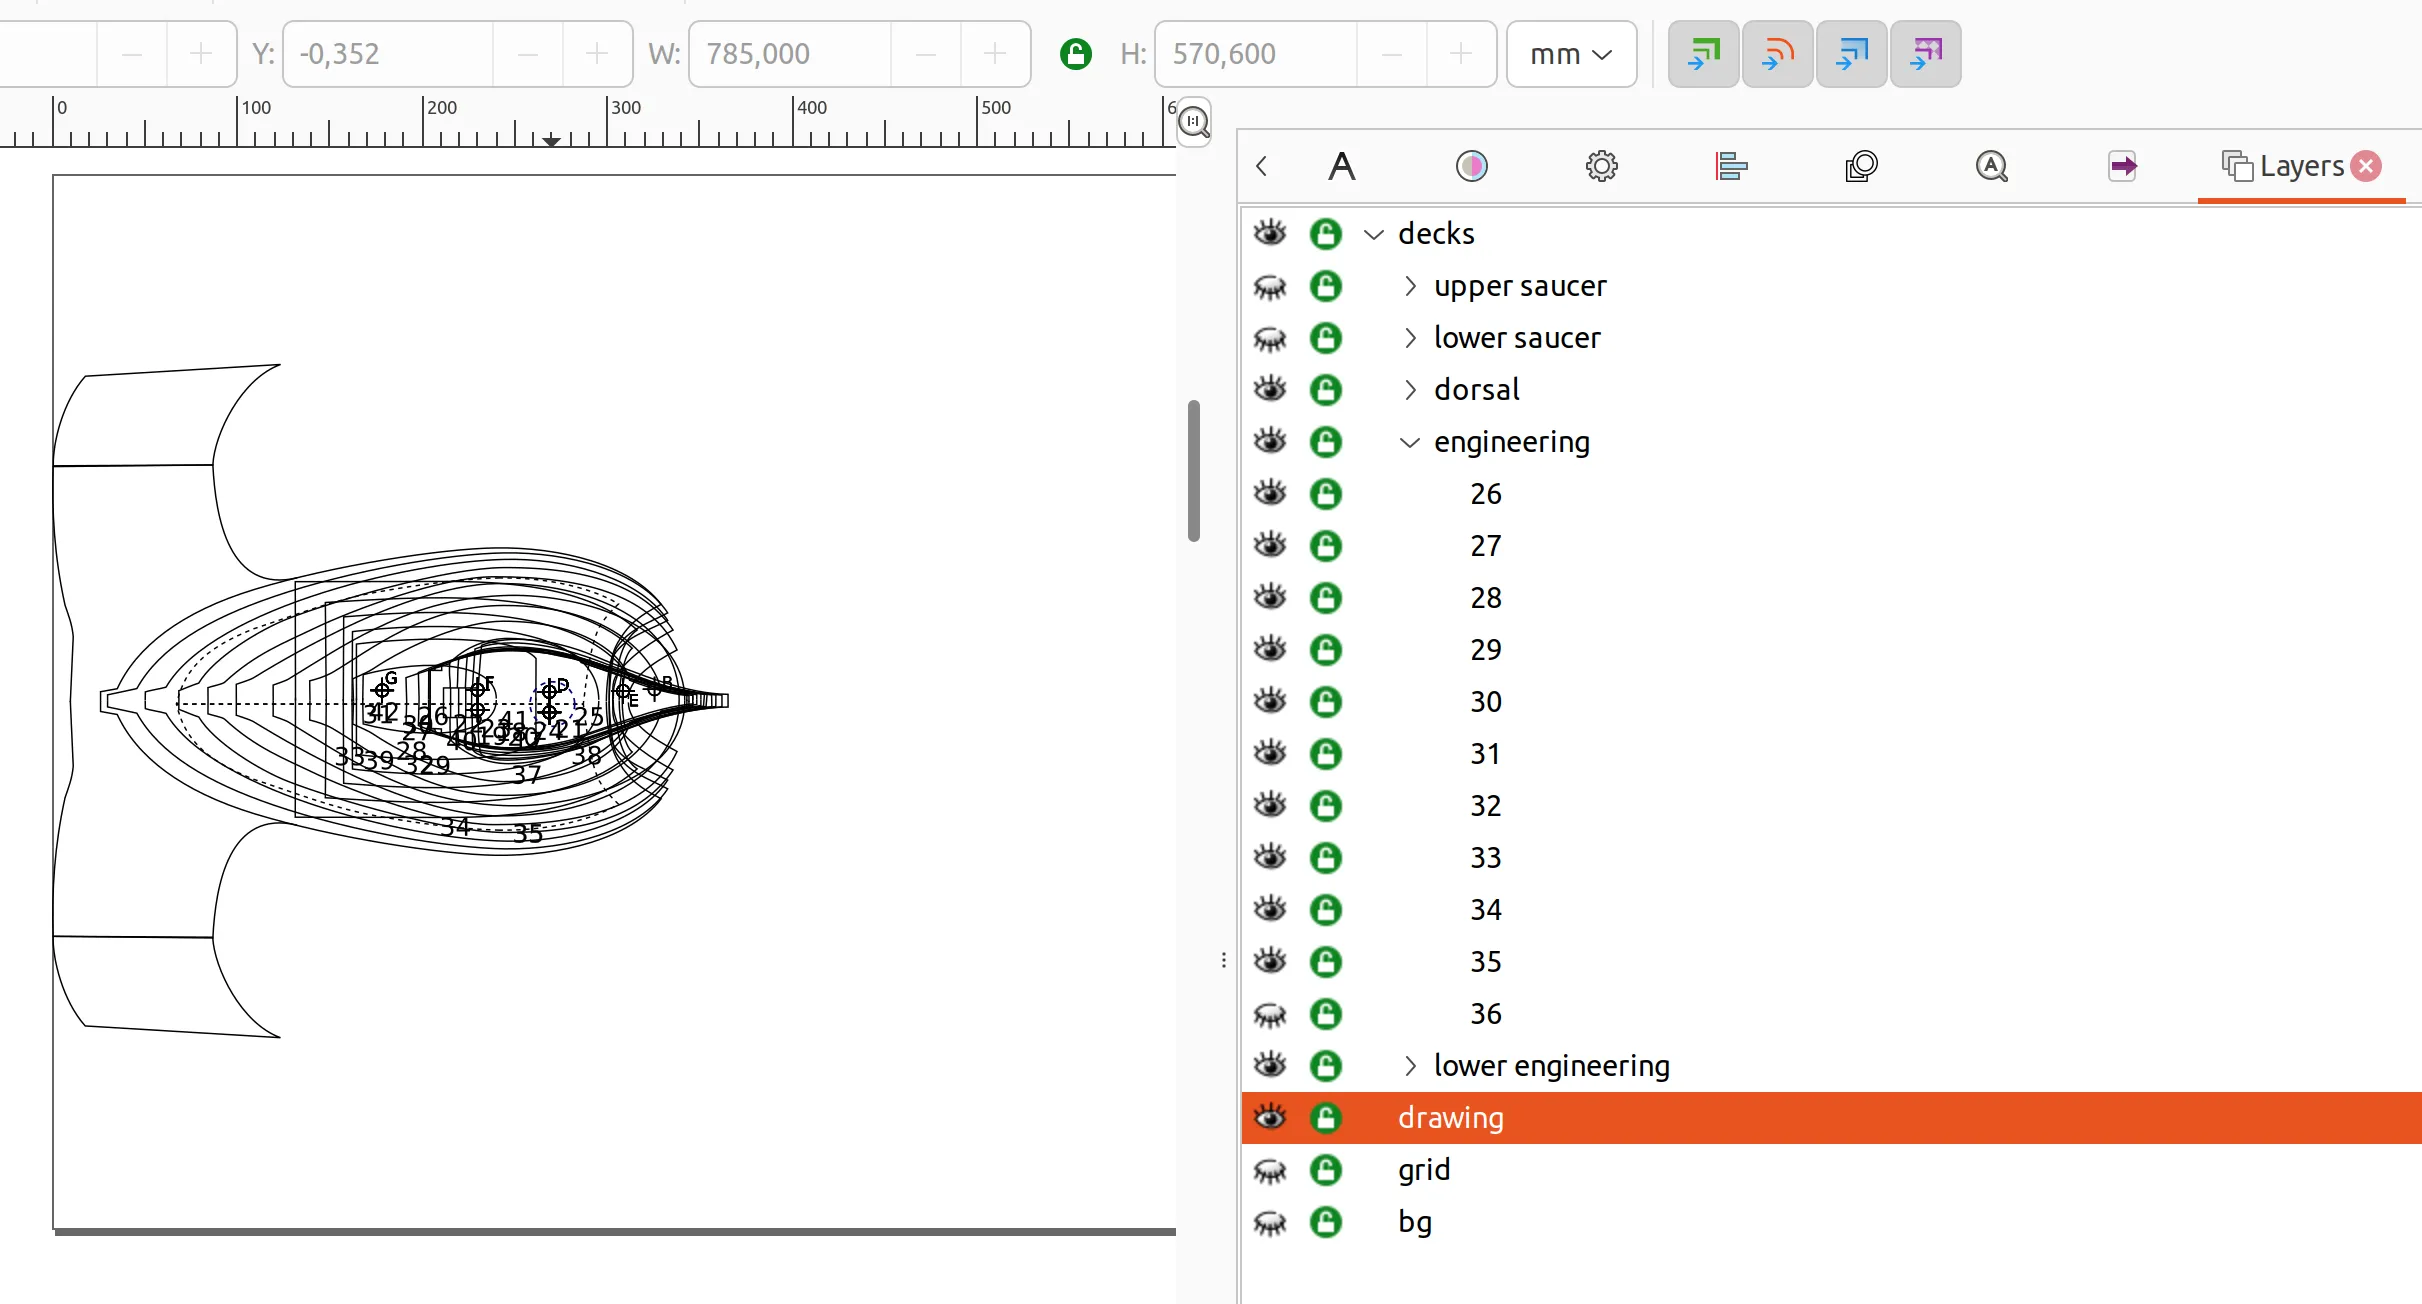
I also moved every deck into its own layer, at least in all-decks-overlay. This makes it easier to work with, because I can hide and show different decks.
The 3D Model
Also in my repository is a project that renders those layers with Three.js.
I have created some helper scripts that extract all layers containing numbers
and stores them in separate SVG files. The 3D model app then loads those using
Three.js SVGLoader, applies a 4mm extrusion and uses ArcballControls for
interactivity. It does not look ready for cinema, but it shows that if I succeed
in assembling the decks the same way, it will probably have roughly the correct
shape.
This model is interactive:
- Left mouse button rotates the model
- Right mouse button moves the model.
- Mouse-wheel goes in and out
New challenges:
I discovered some new challenges.
- The parts holding the warp nacelles need to be bent up by 90 degrees. I found some YouTube videos on how to bend wood. I will try this out.
- I am a bit concerned about the overall integrity of the model. I want to put LEDs inside, so there needs to be space. But it also needs to be stable. Let’s see how this turns out.
- I don’t know how warm LEDs will become. Maybe I need some system to transport the heat away from the inside.
But in the next post, I will first try to transfer the deck-outline onto wood and cut it.
See you then.